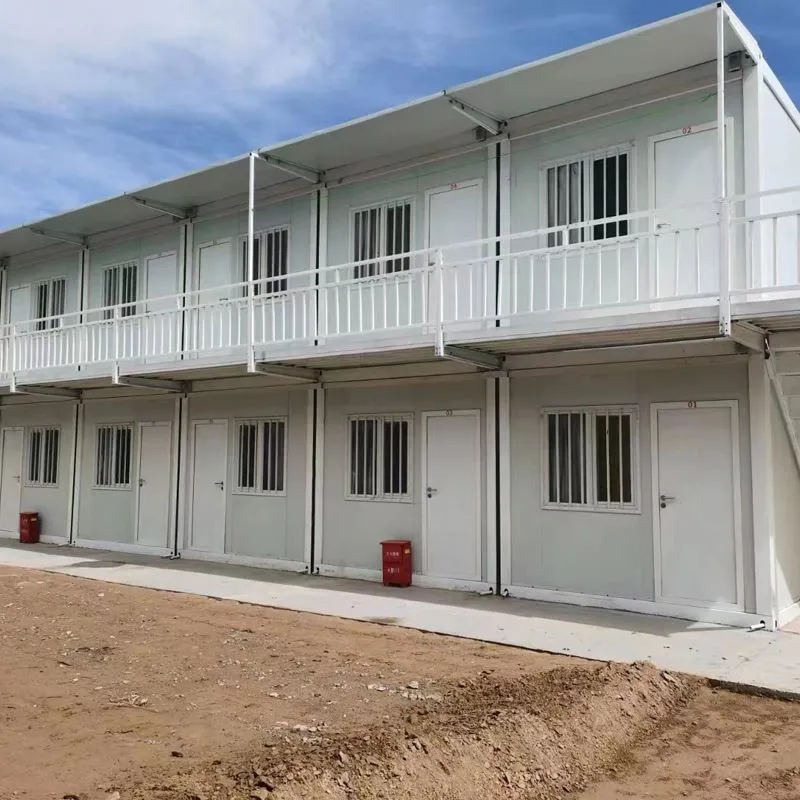
Installing a balcony on a KD (Knock-Down) container can significantly enhance its functionality and aesthetic appeal. As a KD container supplier, I've witnessed the growing demand for customized solutions that make these containers more livable and versatile. In this blog, I'll guide you through the process of installing a balcony on a KD container, from planning to the final touches.
Planning Your Balcony Installation
Before you start the installation process, it's crucial to have a clear plan in place. This involves assessing the container's structure, determining the balcony's size and location, and obtaining any necessary permits.

Assessing the Container's Structure
Not all KD containers are suitable for balcony installations. You need to ensure that the container can support the additional weight of the balcony and its occupants. Check the container's specifications and consult with a structural engineer if necessary. The container's frame and walls should be strong enough to handle the load.
Determining the Balcony's Size and Location
The size and location of the balcony will depend on your needs and the container's layout. Consider the available space, the view you want to enjoy, and the intended use of the balcony. A larger balcony may be ideal for entertaining, while a smaller one could be sufficient for relaxation. Choose a location that provides easy access from the container's interior.
Obtaining Permits
Depending on your location, you may need to obtain permits for the balcony installation. Contact your local building department to find out what permits are required and follow the application process. This step is essential to ensure that your balcony is installed safely and legally.
Gathering Materials and Tools
Once you have a plan in place, it's time to gather the necessary materials and tools. Here's a list of what you'll need:
Materials
- Balcony Frame: You can choose from various materials, such as steel, aluminum, or wood. Steel is a popular choice due to its strength and durability.
- Decking: Select a decking material that is weather-resistant and slip-resistant. Options include composite decking, wood, or PVC.
- Railing: Install a railing around the balcony for safety. You can choose from different styles and materials, such as metal, wood, or glass.
- Fasteners: Use high-quality fasteners, such as bolts and screws, to secure the balcony frame and decking.
- Sealant: Apply a sealant to prevent water from seeping into the container.
Tools
- Measuring Tape: Use a measuring tape to measure the dimensions of the balcony and the container.
- Saw: You'll need a saw to cut the balcony frame and decking to the appropriate size.
- Drill: A drill is essential for making holes in the container and the balcony frame.
- Wrench: Use a wrench to tighten the bolts and screws.
- Level: A level will help you ensure that the balcony is installed evenly.
Preparing the Container
Before installing the balcony, you need to prepare the container. Here's what you need to do:
Mark the Location
Use a measuring tape and a level to mark the location of the balcony on the container. Make sure the marks are straight and level.
Cut the Opening
Use a saw to cut an opening in the container's wall where the balcony will be installed. Make sure the opening is the correct size and shape for the balcony frame.
Reinforce the Container
To support the weight of the balcony, you may need to reinforce the container's structure. This can be done by adding additional framing or bracing.
Installing the Balcony Frame
Once the container is prepared, it's time to install the balcony frame. Here's how:
Assemble the Frame
Follow the manufacturer's instructions to assemble the balcony frame. Make sure all the components are securely connected.
Attach the Frame to the Container
Use bolts and screws to attach the balcony frame to the container. Make sure the frame is level and plumb.
Check the Alignment
Use a level to check the alignment of the balcony frame. Make any necessary adjustments to ensure that the frame is straight and level.
Installing the Decking
After the balcony frame is installed, it's time to install the decking. Here's how:
Cut the Decking
Use a saw to cut the decking to the appropriate size. Make sure the decking pieces are the same length and width.
Install the Decking
Start at one end of the balcony and work your way across. Use screws to attach the decking to the balcony frame. Make sure the decking is level and evenly spaced.
Finish the Edges
Use a router or a saw to finish the edges of the decking. This will give the balcony a professional look.
Installing the Railing
To ensure the safety of the balcony, it's important to install a railing. Here's how:
Assemble the Railing
Follow the manufacturer's instructions to assemble the railing. Make sure all the components are securely connected.
Attach the Railing to the Balcony Frame
Use bolts and screws to attach the railing to the balcony frame. Make sure the railing is level and plumb.
Check the Height
The railing should be at least 36 inches high to meet safety standards. Use a measuring tape to check the height of the railing.
Finishing Touches
Once the balcony is installed, it's time to add the finishing touches. Here are some ideas:
Paint or Stain the Balcony
Paint or stain the balcony to protect it from the elements and give it a finished look. Choose a color that complements the container's exterior.
Add Lighting
Install lighting on the balcony to create a cozy and inviting atmosphere. You can choose from various types of lighting, such as string lights, lanterns, or spotlights.
Furnish the Balcony
Add furniture to the balcony to make it more comfortable and functional. You can choose from various types of furniture, such as chairs, tables, and loungers.
Conclusion
Installing a balcony on a KD container is a great way to enhance its functionality and aesthetic appeal. By following the steps outlined in this blog, you can install a balcony safely and easily. If you're interested in purchasing a KD container or need more information about balcony installations, please contact us for a consultation. We're here to help you create the perfect space for your needs.